VDOM Topology
VDOM
Virtual Domains (VDOMS) is a method for logical division of single Fortigate unit into two or more virtual instances and it function as multiple individual Fortigate unit. Each VDOMS are allow to maintain its on separate zones, user authentication, security policies, routing, and VPN configurations. By default Fortigate unit is operating in default vdom named 'root', and it manage all other VDOM'S global configurations.
Enabling and creating VDOMs
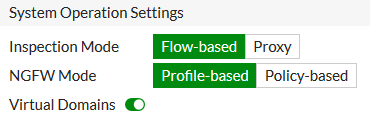
1. To enable VDOMs, go to System > Settings. Under System Operation Settings, enable Virtual Domains
2. Select OK to confirm the VDOM mode change. When the change is applied, you are logged out of the FortiGate or Console > Config system global > set vdom-mode multiple > end via CLI
3. Log back in. To edit global settings, select Global from the dropdown menu located in the top-left corner.
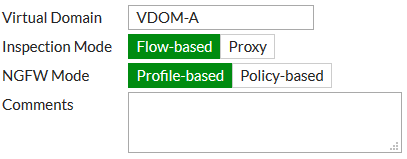
4. To create a new VDOM, go to System > VDOM and select Create New. Enter a name (VDOM-A).
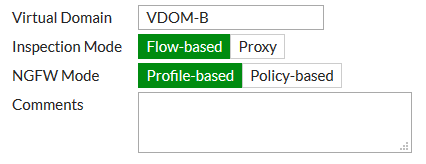
5.Create a second VDOM, called VDOM-B.
Assigning interfaces
In this example, you assign interfaces each to VDOM-A and VDOM-B and WAN is connected to Root: VDOM-A and VDOM-B for use by the local network and Root shares the internet to both VDOM's.(Inter-VDOM link is required)
Root Interface
VDOM-A Interface
1. go to Network > Interfaces and edit an interface
2. Set Virtual Domain to VDOM-A
3. Set Addressing Mode to Manual, assign an IP/Network Mask to the interface.
4. If you need to assign IP addresses to devices on your internal network, enable DHCP Server
5. Repeat the above steps to assign interfaces to VDOM-B.
Inter-VDOM link Configurations
1.Select Global from the dropdown menu located in the top-left corner. Click +Create New and Select VDOM Link.
2.Create a Inter-VDOM Link between Root and VDOM-A.
Once you clicked OK.it will create a virtual tunnel between root and VDOM-A. So we can able to reach the tunnel IP's.
3. Repeat the above steps to VDOM-B.
VDOM-A Policy Configuration
1. After assigned the interface, then create a IPv4 Policy and static route towards the root VDOM link.
2. Select Incoming Interface > Lan1(Internal Users) and Outgoing Interface > Root VDOM Link.
3. Disable NAT and Click Apply.
4. Create a default route towards the Root.
Root Configuration1.Select root from the dropdown menu located in the top-left corner. Click IPv4 Policy.
2. Select Incoming Interface > Root-VDOMA (VDOM-A User) and Outgoing Interface > WAN1.
3. Enable NAT and Click Apply.
4. Create a default and static routes.
4.1 For internet Access
4.2 Reverse route for VDOM-A ,Next-Hop will be VDOM-A link.
Now VDOM-A Users can able to access the Internet. Repeat the above steps to setup VDOM-B.


Comments
Post a Comment